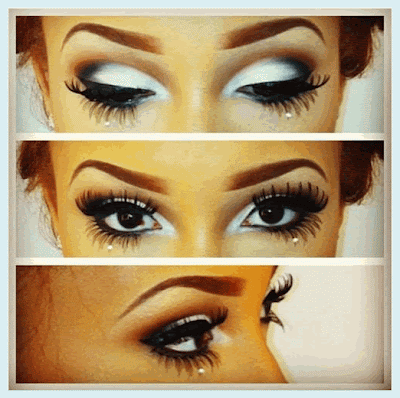
I have so many ladies who say, "I dont mess with lashes my cousin eyes got stuck together," or "I wanna wear em but I can get it right." Well ladies, this post is for you! Eyelashes are the great eye enhancer, aside from adding eyeliner or mascara. Done right, it can give you the dramatica for a night on the town or that fresh look of bright eyes looking wide open for your wedding photo. Whether the reason your wearing eyelashes is for volume or just because you like them, I will show you how! Keep reading *winks.*
First look at the package eyelashes come in its in the shape of a horseshoe. The reason being its maintaining a shape.Imagine that being your eyelid.
- Take the lash off package
- Apply glue to the lash very lightly. Hold lash in between 1st finger and thumb for at least 12 secs.
- Place eyelash on your eyelid from inner corner to opposite corner.
- Now pat eyelash in place. You can use finger, Q-tip or Toothpick. (Be very careful.)
- If you did step 1 thru 4 right, the eyelash should line up perfectly.
Now for my visual people. Heres a photo:
 |
| ufashiontrends.com |
Above was the experienced application. Now I know some of us may require more direction. Below is a step by step for a novice user. Enjoy!
Second step: Choose the color and length of lash you want. If you want a more natural look, don't go for the ones that are extra dark or long. Try one that looks similar to your natural lashes to add fullness or try those that gradually get darker toward the ends.
Third step: If lashes are too long for you, you can trim them lashes according to the natural look and shape with small scissors. Be care doing this step. If you're a novice, get some assistance via a makeup artist or eye brow/eye lash specialist.
Forth step: To add the adhesive (glue) for fixing the eyelashes. the dark color glue helps to define the lash line. You can use toothpick for this along the line of the lash. Don’t use too much glue.
Fifth step: While looking the mirror, start applying the lashes at the inside corner to the outside corner, then press and hold it. You can also use a Q-tip to do this because your fingers may stick LOL. Don't worry if you don't get it right the first time. Be patient and take your time. Be sure the ends are down good.
Sixth step: After applying eyelashes, let them for dry for a few seconds.
Seventh step: Use the eyeliner and mascara to unify the look of our lashes.
I normally don't have to curl my eyelashes, but for some you divas, you may have long eyelashes, or maybe shorty curly eyelashes. To avoid your falsies not looking cohesive, curl them and add mascara first. The after effect should look uniformed.
Here are some examples I found of the good & bad when done right & wrong. These are playful, natural & dramatic looks appropriate for any occasion you feel meets these looks. Have fun!
Now some NOT so flattering...
Now my point is, ladies anything that's for you should look & feel good. You should NOT be able to see your eyelashes when you open your eyes. Never should they look off track when you close your eyes.
When adding something, it should not take away from your beauty. Hopefully, today's post is helpful & you're now a bit more comfy about wearing falsies. Remember, it's trail & error. If at first you don't succeed try again. *winks*
Some of my work
Now on myself, I LOVE switching my lashes up daily. I apply black liner to give that POW! Smokey eyes goes well with my bigger lashes. Don't knock it til you try it!
Thanks for staying tuned ladies! 'Til next post! Stay True Stay You Stay FaBB
Smooches MJ xoxo


5 comments:
Love the tips! I'm def into my lashes and love the strips vs. the individuals... It's no-commitment fab and you can change up for diff. occasions.
Thanks for this! So needed
I think I might give lashes another try with these tips
How do you do the extension on the bottom with seeing glue or the knots from the lashes
fear of god essentials
jordans
kyrie shoes
a bathing ape
goyard outlet online
hermes outlet
golden goose outlet
curry 8
off white outlet
fear of god essentials hoodie
Post a Comment